|
8/2/03
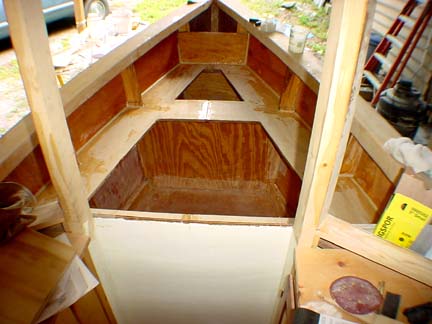
August is here and we are into the home stretch, I hope! We've been working on getting the front deck and anchor well
cut out today and hope to install them tomorrow. I foamed the front section behind the stem and the bottom of the anchor locker.
There will be a raised floor in the anchor locker that will be above the waterline to allow it to self drain. The hold under
the front deck looks like it will be plenty big enough to store a couple of bikes or extra water and fuel if need be. I may
put a raised floor in the hold area if it gets water in but I expect it to stay dry if I get a good seal on the hatch. Look
for pictures in a few days.
8/3/03
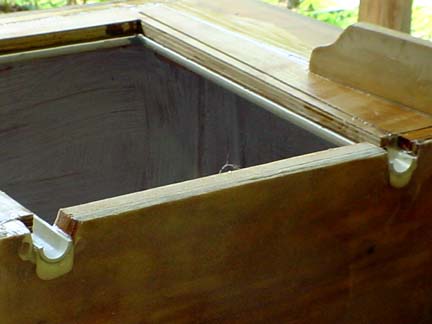
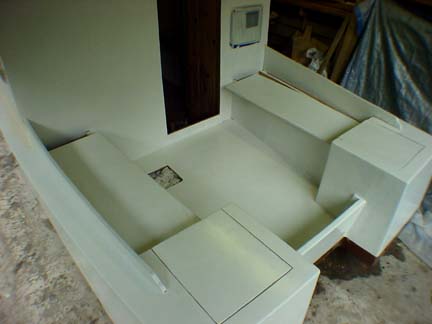
The picture is of the drip channels in the back lockers tops. I will set them in the top of the top of the boxes
and hopefully keep the lockers dry. I used a 1" pvc pipe cut in half and then I cut a slot in the underside of the locker
top. Epoxy it all together and there you have it.
The other photo was taken tonight off the back deck. This is what I wake up to every morning and it is also the thing
we will miss the most when the State Highway Dept. buys the house later this year for a road expansion. I think everyone will
agree that it's quite a view.
8/05/03
If finally happened.................I knew it would happen sooner or later.........I'm told it happens to all who build
boats...........I was just hoping it wouldn't happen to me! Yep, I finally had a batch of epoxy not get hard and of
all places it was in the bottom of the anchor well. While I was mixing one of the 6 or so batches I did yesterday I must have
gotten batch number 2 wrong. I didn't have enough to wet out all the glass in the bottom of the well and mixed up a second
batch and it appears by the color that I either got some of the 2 to 1 activator (left over from the cabin top) and mixed
it with a 1 to 1 ratio or got 100% activator instead of the resin/activator mix. I spent the morning getting as much of the
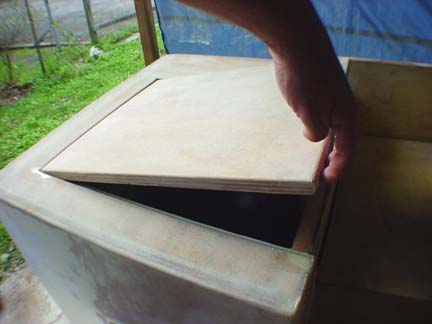
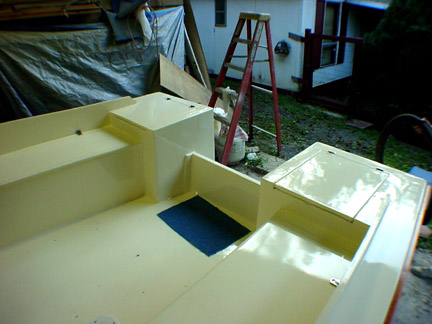
honey like stuff out of the well and doing it over, hopefully right this time. I'll know tomorrow. The picture is of the front
deck still lacking the fiberglass and hatch covers. The rear locker covers are now epoxied in and the lids should be done
tomorrow. I think the drip channels are going to work out nice.
8/12/03
I've been spending most of my time this week sanding. I put the headers in that are over the front 3 windows. I had been
avoiding them because of the stress that the roof is under due to the bend around the front of the cabin and there is also
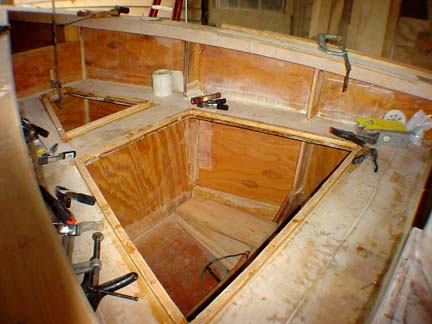
a double thick piece of plywood that makes that area very stiff. I also put the railing on around the front hold that will
keep the water out. I will make a lid out of 3/4 ply to cover that area later. The lockers in the rear of the boat took more
time than expected but they turned out nice and should be waterproof. I think all the epoxy work on the exterior is done.
As soon as I get it all finished sanded I should be able to put on the primer. I ordered another gallon of the epoxy primer
from Lewis Marine just in case I don't have enough. I tried to guess how much it will take but it looks like there will be
more area than I thought that will need to be primed and then painted.
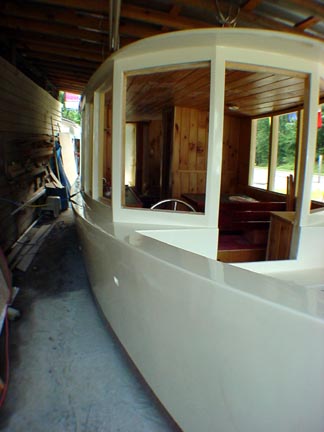
8/17/03
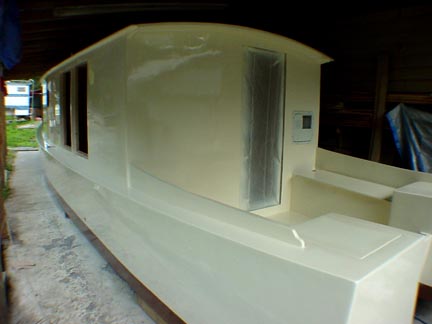
It's been a very productive weekend. We got the whole boat primed and I painted the cabin on the port side in the
Old Hatteras off white that we will use on the rest of the boat. The finish turned out as a high gloss to rival any
showroom finish. I sprayed it on and I'm really happy with the result. I should have the rest of the hull and cabin done next
weekend. One of the nice things about the primer is that it sands very easy. The gloss makes all the hard work and hours upon
hours of sanding worth the effort. I will spray two coats of color on the whole exterior. Debbie got the lockers painted a
gloss white and cleaned up a lot of the mess I've been making.
An interesting note: My computer is upstairs and I have a big window that looks out over the street in front of
our house and as I sit here updating this page I just looked out to see a huge deer walking up the center of the street!!
Such is life in the mountains!!
|
| Painted finally |
8/24/03
The pictures above and to the right were taken today after spending 4 hours with the spray gun painting the whole boat.
We call this another milestone for us. After 16 months of looking at the boat in a variety of shades and colors it's all the
same (glossy) color for once. I will need to sand the whole boat again with 320 grit paper for the final and last color coat
of paint. It took 8 quarts to get to this point but it shows in the finish. The final sanding will go a lot quicker than the
rest of the job as all I need to do is just rough it up a bit. The mahogany trim will be the next thing to be done and then
start hanging hinges and hardware and it's back to finishing out the interior, which only lacks a little, put on the motor
and splash this baby in the lake. Yeah!!!! I'll post a launching date when we get a little closer to that big day but for
now I'm telling everyone it will be done when it's done. I'm guessing another 6 weeks assuming we sell some of the other toys
to pay for the outboard.
8/27/03
Bad news! I tried to turn on the computer and there seems to be no life in it at this time. I have the second
computer hooked up but I have a lot of your e-mail addresses on the old computer instead of this one. If you get e-mail from
me about the boat or anything else, please drop me a line so I can get the address book up to date and keep everyone informed
about the happenings at the boat yard. I'm also curious how many people read this page. I was getting about 35 hits
a day back when I had the counter on. Not bad for an old boat page.
I got the rub rails cut from the mahogany last night and started to scarf them all together. I think it's going
to be hard to handle a piece that's 40' long and only 1 1/2" wide. I was hoping to finish them before putting them on the
boat but I may need to leave them in two long 20' sections and then join them as they go on the hull. I'm open for any suggestions
here.........
9/1/03
I was talking with my neighbor and told him about the computer and he showed me the post on his front deck that was exploded
when the lightning hit it the same day as the computer problem. Guess that explains things.
Not much work this week on the boat. We went to the coast to take it easy and look at boats for the Labor Day weekend.
Beaufort, NC has a great waterfront and a great boat library at the Maritime Museum and all for free. They also have a working
boat shop across the street that builds and repairs wooden boats. While in the reading room I was looking at the
#1 issue of Wooden Boat magazine and the first boat building story they ran was about building sharpies. Interesting.
We made a stop at the Boater's World store to cash in some of our captians club certificates for more boat stuff. Got
2 Nicro solar ventilators and a 50', 30 amp power cord. I did get the drip channels installed under the big side lockers in
the back cockpit and all I lack is doing a final fitting for the deck lids. I finally figured out the best way to shape wood
after it's been installed. I have tried to sand, cut with the jig saw and drill but the best way is with a router bit in a
small air die grinder. Like having an alligator in your hand...........if it bites you it's not like using the sander!! No,
I haven't been "bit", yet, but after watching the work it does on the wood it really saves a lot of time. I put in the drip
tubes which are pieces of 1" pvc pipe cut in half and the router bit made short work of it. Just watch those teeth. I don't
think this idea is OSHA approved.
9/5/03
I was just looking thru the Duckworks page, an online homebuilt boat magazine, and there is an artical about using a
polyester film on top of a freshly done glass and epoxy layup to get a glossy finish without all the fairing that is normally
done. For the builders that read this page it would be a good idea to check it out at http://www.duckworksmagazine.com/ They might charge a subscription to view the page called " A new technique for glass and epoxy" but belive
me, it's well worth it. I wish I had read this before I started all my epoxy work and I could have saved myself lots of hours
behind the sander.
9/9/03
Fall has finally arrived and the weather is cool and crisp. Great for boatbuilding! We spent the whole weekend
getting the boat sanded, again, and the second coat of paint is now on. The final sanding with 320 grit paper improved the
shine even more. I ran out of paint before the roof was done but we should have it done next weekend. The Coast Gaurd
requires all boats to have a Hull Id Number and I used the air grinder to carefully carve my assigned number on the stern.
I was a little tenitive about carving up my new paint but it turned out nice. Now we can start putting on the hardware and
rub rails that were cut last week. More pictures soon.........
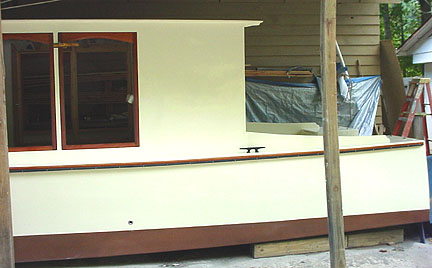
9/14/03
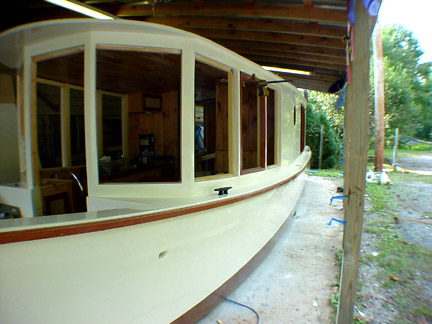
We spent the weekend getting the rub rails cut, sanded and epoxied. The picture of the port side shows how they will
look when they get done. I still need to put on the strip of star board that will be the first contact with the dock but I'm
happy with the look so far. There will be several coats of varnish over the epoxy to keep the UV rays off the epoxy. Epoxy
is great stuff but needs a top coat of something to keep it from turning cloudy. Varnish or paint works well enough. The lockers
in the rear cockpit have the hinges on and look good. They even open and shut well. I didn't know if the arch along
the side would interfere with the way they open but it worked out well. At least all the painting is finally finished. I ordered
another 3 quarts of Interlux and used every drop finishing up the roof, rear cockpit and locker lids. Next on the list is
to get all the windows and doors in just in case we get a cold Fall season. I am supposed to go fishing next week at Cape
Hatteras but it looks like the hurricane in the Atlantic may have other plans. We'll need to wait and see. A force 5 hurricane
is not good news for the Outer Banks. Mark Van Abbema is cruising out that way in the sister ship to mine and I hope he manages
to dodge this one.
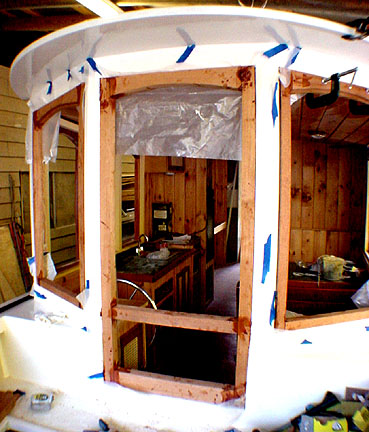
9/22/03
I received an e-mail from Mark and he rode out the storm in Annapolis and did fine. That makes 2 hurricanes without any
damage for the Mark V-39. My trip to Hatteras Island was canceled till later this week. The storm cut a new inlet thru part
of the island and the people that stayed in the village are stranded until the DOT figures out what they are going to do.
Highway 12, the road that runs the leangth of the Outer Banks was completely covered by the dunes and it will probably be
90 miles of four wheel drive when we finally do get to get on the island. Charlie Schiel's house was one of the few that
wasn't damaged so at least we will still have a place to stay. We worked all weekend making the window frames and
door for the front of the boat. The rub rails got epoxied and varnished and put on the boat. I'll post a picture of the finished
rub rail detail tomorrow.
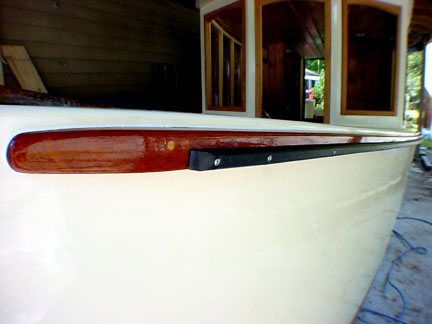
9/23/03
The one thing that I notice most when I get near a charcter boat is the lines and rub rails. The pictures show how mine
turned out. The mahogany is beautiful and the black bumper strip I made out of starboard really gave them a finished look.
The bumpers can be replaced in less than a day and for very little money if they get dinged up over the years. There
will be a rub rail at the water line done the same as the top ones. The picture of the front door and windows shows the way
I do the glue ups. Because all the windows are custom fitted to the opening and no two openings came out the same exact size
I dry fit the frames in the openings and then take them apart and put on the epoxy. I put a screw in each corner and then,
using a piece of plastic in each corner to keep them from sticking to the opening, fit them back in and let them set overnight.
This way I'm assured that they take the shape of the opening rather than doing them on the bench and taking a chance of them
being out of square, or in my case square, which the openings are not. I'll pull the plastic out tomorrow, put bungs in the
holes from the screws, sand the frames, route them and then epoxy and varnish. A lot of work for sure but oh what a look!!
It's off to the coast to do some fishing for a week so the next update will be the first week in October.
|